學到新資視了 - Highcharts / Vue 做個記帳本 (下)
昨天已經將記帳本打造出一個基本雛形了,但似乎功能並不是很多,純粹就只是看到消費的金額和走向而已,所以我們今天來利用圖表的「事件屬性」搭配 Vue 的 emit 來為記帳本新增一個查看明細的功能吧。
記帳本實作
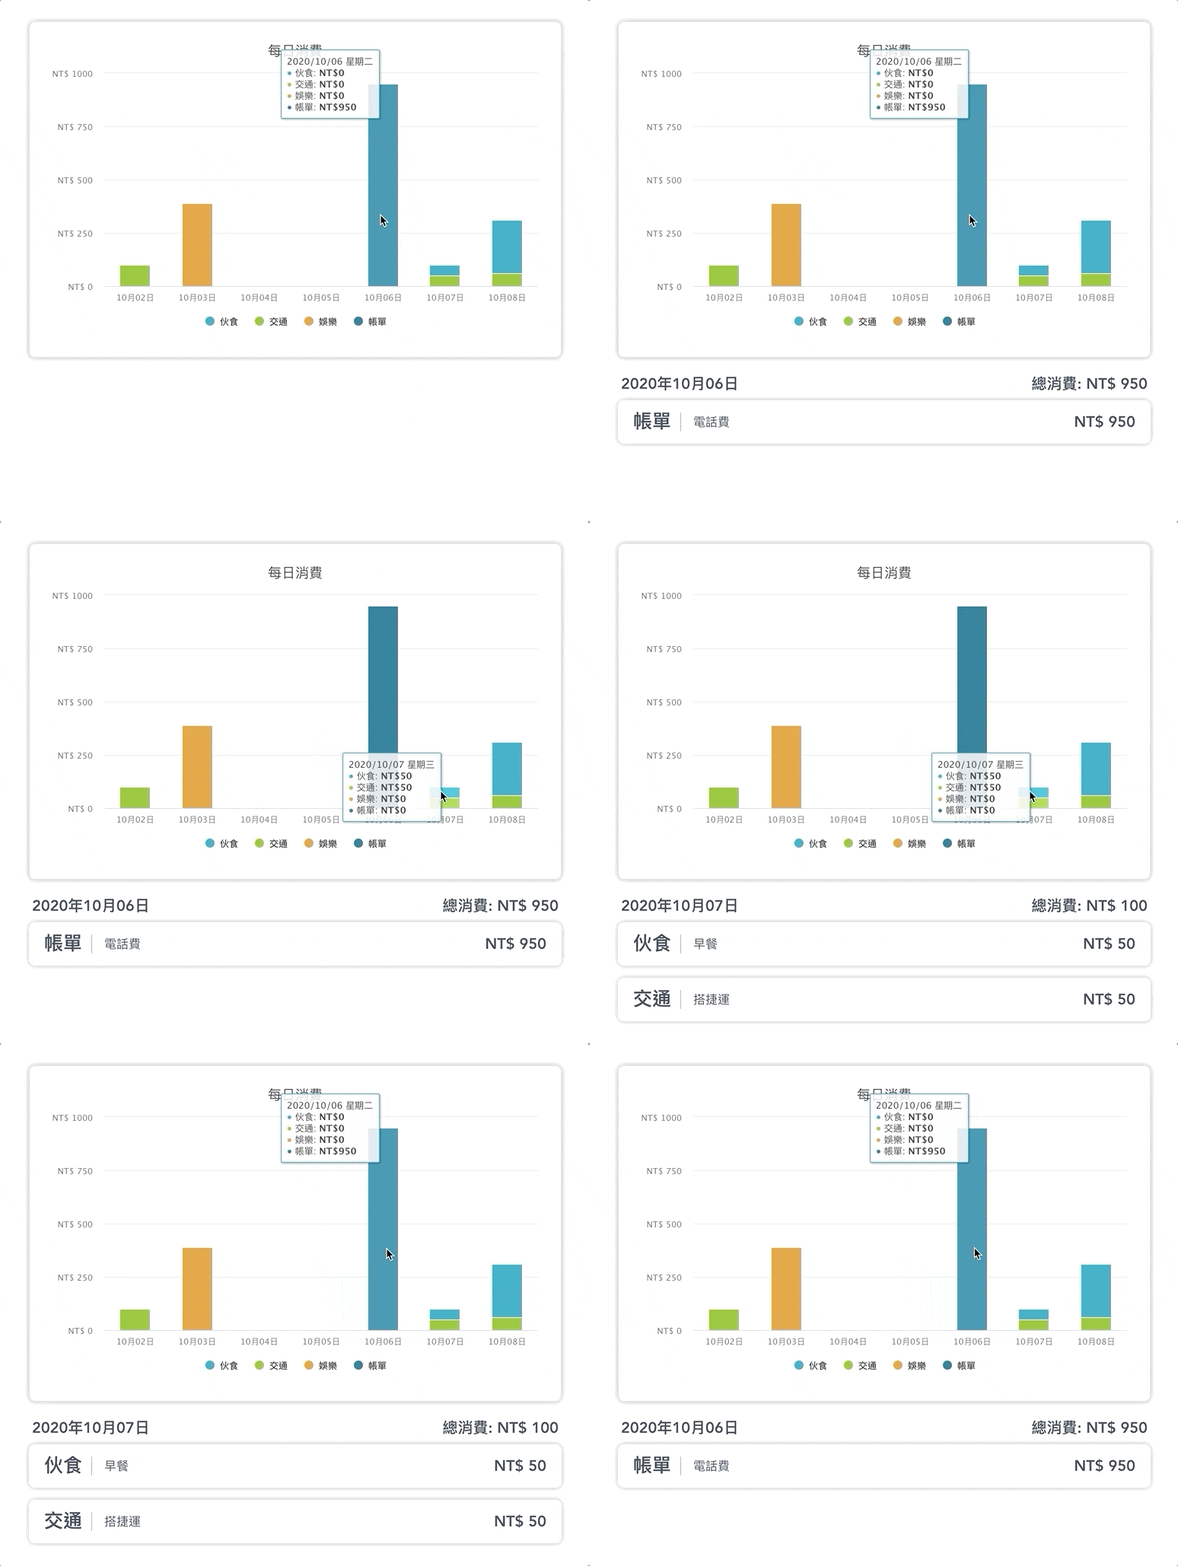
就像下圖所示,這次要做到的功能是希望能點擊「數據列」時,在下方顯示當天的消費明細以及總金額,讓我們的記帳本有更完整的功能。
而開發的邏輯是透過點擊拿到數據點的日期時間戳,然後利用父子層的溝通來將這個時間戳傳遞到一個新的「清單元件」中,清單元件會拿這個時間戳去打 Json-Server 的 API,取得該日期的帳目定顯示於畫面上。那就馬上動手開發吧!

1.設定事件屬性
我們在圖表元件 LedgerChart.vue 中新增一個 Method,並將它作為圖表 click 事件的回呼函式,而由於回呼函式可以接到 Highcharts 的 event 物件,我們就可以拿到時間戳,並利用 $emit 來傳至 App.vue。
methods: {
  selectDate() {
    this.$emit("selectDate", event.point.category)
  }
}
// computed
options() {
  let options = Object.assign(this.chartOptions, {});
  options.series = this.seriesData;
  options.xAxis.categories = this.xAxisCategories;
  options.plotOptions.series.events = {
    click: this.selectDate
  };
  return options;
}
2.父層監聽自定義事件
剛剛在 LedgerChart.vue 有 emit 了自定義事件,現在要在父層來監聽接收這事件,這樣每次點擊數據列就都會更新 date 了。
<template>
  <div id="app">
    <LedgerForm />
    <LedgerChart @selectDate="selectDate" />
  </div>
</template>

<script>
import LedgerForm from "./components/LedgerForm"
import LedgerChart from "./components/LedgerChart"

export default {
  name: "App",
  components: {
    LedgerForm,
    LedgerChart
  },
  data() {
    return {
      date: 0
    }
  },
  methods: {
    selectDate(val) {
      this.date = val;
    }
  }
}
</script>
3.清單元件 - LedgerList.vue
再來就是下方要顯示的明細清單了,檔案內容如下,主要是透過接收一個 date 的 Prop,每當它更新時就會觸發 watch,然後利用 Json-Server 的 Filter 功能來抓出「當天」的資料,如此就能將消費明細顯示在畫面上了。
明細上方的日期和總金額透過
computed計算即可得到,因為不是重點,這邊就將程式碼省略了。
<template>
  <div v-if="date">
    <div class="ledger-item" v-for="item in fetchData" :key="item.id">
      <div>{{ item.category }}</div>
      <div>{{ item.description }}</div>
      <div>NT$ {{ item.amount }}</div>
    </div>
  </div>
</template>

<script>
  export default {
    props: {
      date: {
        type: Number,
        default: 0
      }
    },
    data() {
      return {
        fetchData: []
      }
    },
    watch: {
      date(val) {
        this.axios.get(`http://localhost:3000/accounts?date=${val}`)
          .then((response) => {
            this.fetchData = response.data;
          });
      }
    }
  }
</script>
4.掛載元件並傳入 Prop
清單元件完成後就將他掛到 App.vue 上了,並且記得要把剛剛的 date 傳進清單元件中。如此一來我們就成功增加了查看明細的新功能囉!
<template>
  <div id="app">
    <LedgerForm />
    <LedgerChart @selectDate="selectDate" />
    <LedgerList :date="date" />
  </div>
</template>
花了四天的時間我們從熟悉 Highcharts-Vue 的使用到最後開發出一個小作品,相信大家應該有感受到 Highcharts 與前端框架的配合是多麼的方便好用。不過隨著記帳本的完成,這個系列文章也即將告一段落了,明天最後一篇文章則會做個系列的總結,並講講我的參賽心得。
- 此篇文章為「iT邦幫忙鐵人賽」參賽文章,同步發表於 iT邦幫忙 -
